Monday, February 18, 2008

Luke, I am your father.

Check out my new respirator! 

The hull panels are complete and the scarf joints have been sanded smooth. I spent all of last week, taking my time, gluing the sections together along the hull pieces. In tandem with the hull panels, I also epoxied the scarf joints of the sheer clamps (these are long 1" x 3/4" that are glued to the finished side hull panel to add structural integrity and additional surface area for the kayak deck to be attached to. 

I spent a few hours today using the electric sander to smooth out the epoxy squeeze out from the scarf joints. This epoxy stuff is pretty hard stuff, but with some 100 grit sand paper and some muscle, I sanded it all down. The respirator I picked up yesterday was just for this kind of sanding work. I don't want to breathe wood and epoxy dust. Also during the sanding I placed a box fan as an outlet exhaust fan to help clear the dusty air as I worked. 

Next step: I need to epoxy the sheer clamps to the side hull panels. This steps involves a lot of clamps and patience to get the pieces set in just the right place.


Monday, February 11, 2008

I'm Rubber You're Glue

Kayak construction has begun! 

The first steps consist of gluing together the 8' long plywood panels (that make up the kayak hull) to make even longer 17' panels. The joints where the panels are glued are called "Scarf Joints" and are beveled which increases the surface area and thus a stronger bond. Epoxy is used which is a super duty adhesive/glue/bond-o compound that I mix together just before use. 

At this stage in the process it's prudent to make sure all the panels and joints are lined up according to the plans as misalignment now probably will spell disaster later on. The hull panels are 17' finished but are made up of three piece glued together. In order to assure proper alignment of these panels I stretch a string baseline along the length of the construction area. From this straight line I can measure the correct offsets of the panels along that line. For example, the manual lists the mid-point offset from the baseline as 1 11/16". 

I will be gluing for a while. Each of  the 4 finished hull panels consist of 3 sections which each need gluing at the scarf joint. Each glued joint needs at least 24 hours to dry and harden. In some cases, though, I am able to glue multiple joints at the same time to save time. 

It's exciting to finally start the construction process and already see progress happening. As I am experiencing, though, a lot of patience is necessary. Patience to read (and re-read and triple read) the instructions and patience to make sure everything is correct and finally patience to wait while the glue dries. 


Friday, February 8, 2008

Fra-gee-lay. That must be Italian.

The weather for the past month has been pretty much miserable. If it's not raining, it's snowing. And if it's not cold it's frigid. So the prospect of heading into the garage during this time of year has been keeping me a little unmotivated. But the purchase of an old $5 space heater from Goodwill has changed my outlook. So yesterday I fired up the heater and started unboxing all of the long strips of wood panels that will eventually be glued together. 

It's amazing at this point to see the strips of wood and know that this pile will turn into my sea kayak. I'm getting closer and closer to actually starting the first step in the instruction manual. Also yesterday I popped my head into the marine boat store that is directly across from the Lowes near my house. I discovered there a complete section of tools and brushes and gadgets that I will need in the epoxy/fiberglass stage. It's great to know that resource is so close to home.

Sunday, January 27, 2008

Bubble Boy

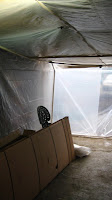
The plastic tent, aka The Bio-Hazard Quarantine Area, has been completed. Again, the purpose of this construction is to create a build-area that is not only protected from the elements (leaky garage roof) but to have a warmer place to work. I'll use a small space heater that will hopefully generate enough heat over time to warm the air inside the tent. 
I need to do this to not only be more comfortable, but also it is critical for the air temp to be warmer for the epoxy to cure. 

I'm getting closer to cracking open the big box and starting the actual build. Next steps 
include getting a space heater and building two saw horses that 
will be used extensively 
through out the project. Regardless, things are moving along. I realized this week that my motivation to hang out in a cold, fluorescent lit garage, inside a plastic tent is not high on my list of fun. I reminded myself that it's only January and I have a lot of time before summer rolls around. Besides, it's suppose to snow tomorrow in Portland!


Friday, January 18, 2008

The kayak has landed


Today the kayak arrived. I had to call UPS to get them to schedule the delivery, but once I did it took them only a few hours to get out to my house. I was not expecting the big UPS semi-truck that rolled up to the house, though. Uh-oh, I thought. Must be big boxes, but to my surprise the shipment looks smaller over all than I expected. From those three boxes will come my kayak. wow. 

Now everything is in the garage except for the instruction manual, plans and overview DVD on building the boat. I already watched the 60 minute tutorial which has simultaneously excited me and almost daunted me on the task at hand. There are definitely a lot of steps and some clever clamping in my future. I feel confident, though, in the instructions and my ability to be patient. 
My next immediate steps are to finish setting up the garage for the construction. Of the top of my head,  here's what I need:

• Fluorescent shop lights and small space heater
• Wood saw horses
• Plastic sheeting for warming tent
• Some plywood to make a long table to layout and assemble wood parts
• More clamps.

Thursday, January 17, 2008

Almost Here!


The 85 pound UPS shipment is in Portland!! I'm waiting to hear the distinctive drone of the UPS delivery truck.....

Monday, January 14, 2008

Project: Building a Kayak


I'm going to build a kayak. It's in my blood. My grandfather was a wooden boat builder all his life. Now it's my turn. I'm going to construct a 17' sea kayak purchased as a kit from Chesapeake Light Craft. These boats are made from mahogany plywood in the "stitch and glue" method. I suspect the project will take me 2 months to complete, but of course, it might take a lot longer. Who knows.

I have chosen to build the Chesapeake 17 LT. Here are some stats from this boat:
• Length: 16' 10 3/4"
• Beam: 23 1/2"
• Depth: 12"
• Weight: 45 lbs
The shipment from Baltimore, MD is schedule to arrive this coming Thursday: eight-five pounds and three boxes, which includes everything that I need to build.


At this point I have decided to build the kayak in my garage, which I have discovered during thunderstorms, is not the most weather proof structure. For this reason, and also for the fact that I am starting this project during the winter, I have chosen to build a warming tent within my garage, made out of 3/4" pvc pipe and heavy plastic. This will serve two main functions: firstly, keep the kayak protected from the elements and secondly, keep the kayak area warm during the epoxy gluing and drying steps.


I purchased all the pvc pipes and joints that I needed at Lowes and with some trial and error engineering I squeezed this thing in to the garage. The tricky part was to make a notch out the end that allows for the garage door to swing closed.